|
|
|||||||||||||||||||||||||||||||||||||||||||||||||||||||||||||||||||||||||||||||||||||||
|
|
|||||||||||||||||||||||||||||||||||||||||||||||||||||||||||||||||||||||||||||||||||||||
 |
|||||||||||||||||||||||||||||||||||||||||||||||||||||||||||||||||||||||||||||||||||||||
 |
|||||||||||||||||||||||||||||||||||||||||||||||||||||||||||||||||||||||||||||||||||||||
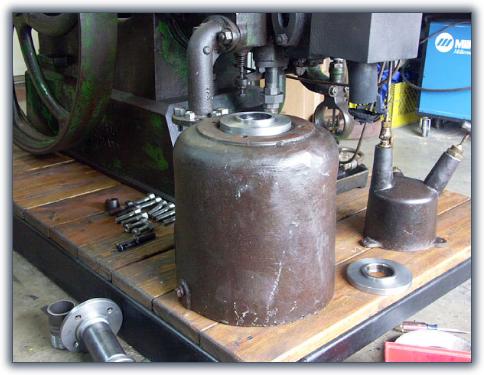
When restoring an engine, the result will be best if all the parts match. For instance, an engine with a first-class mirror-finish paintjob would probably look a little "off" if one of the flywheels was left with only primer on it. By the same token, an engine that is left in its original "working clothes" might look a little out of sorts on a polished chrome cart. Right or wrong, that was my mindset when experimenting with "reverse electrolysis." I had some new bolts and flanges that looked out of place on a rusty old engine. Normally when you hear of "electrolysis" in regards to engine restoration, it is describing an electrolytic process of rust removal. It works great. But my thoughts were that if electricity could be used to remove rust, it could also be used to create rust. |
|||||||||||||||||||||||||||||||||||||||||||||||||||||||||||||||||||||||||||||||||||||||
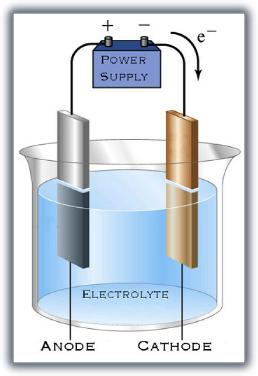
The basics of electrolysis aren't extremely complicated. For rust removal, the rusty part (cathode) is placed in a bath (electrolyte) along with another chunk of metal (anode). Before we go further, remember that rust is iron oxide -- iron and oxygen. The oxygen has a negative charge. Note the accompanying diagram. Electrons flow out of the power supply, into the cathode, across the electroyte, into the anode, and back to the power supply. The surplus of electrons (and negative charge) on the cathode crowd out the oxygen ions, and they leave. But for our purposes here, we WANT rust, so our part is the ANODE and is hooked to the positive side of the power supply. Negative ions (oxygen, for our purpose) are attracted to the anode. The oxygen zooms over there, combines with the iron, and forms rust. If this is grossly inaccurate, my apologies to Miss Holey, my high school chemistry teacher, who tried her best to educate me no matter how much I resisted. |
|||||||||||||||||||||||||||||||||||||||||||||||||||||||||||||||||||||||||||||||||||||||
 |
|||||||||||||||||||||||||||||||||||||||||||||||||||||||||||||||||||||||||||||||||||||||
 |
|||||||||||||||||||||||||||||||||||||||||||||||||||||||||||||||||||||||||||||||||||||||
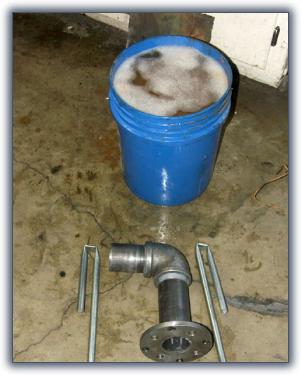
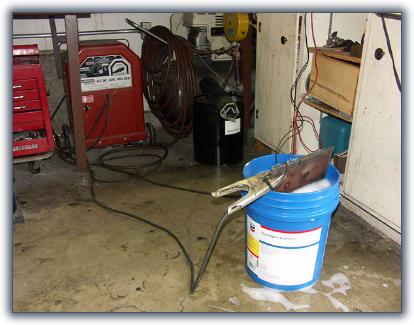
Here are the basic parts: The bent pieces of emt will be the cathodes, the bucket is full of water with a cup or two of baking soda. Don't put the baking soda in right away; we'll get to that in a little bit. The work in this picture is a rather complex shape. It's best to have simple shapes so the rust will be more even. The bent coat hanger is to wrap around your work. Don't put good clamps or alligator clips into the electrolyte, or they will get all rusty as well. Be sure to wire wheel any coating off of the coat hanger so it will be able to conduct electricity. You will also need a power supply. A car battery charger will work well, but the following pictures you'll see me using the arc welder. It's FAST. Some might become frightend by using the arc welder to energize a bucket of water. Analyse the situation, and if you can't do it safely, you should leave this web page immediately. |
|||||||||||||||||||||||||||||||||||||||||||||||||||||||||||||||||||||||||||||||||||||||
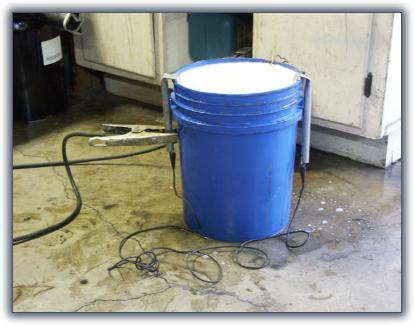
Here is one of my setups. Notice the jumper wire between the two pieces of emt. I used two pieces to better surround the work with electricity. The process is primarily line of sight, so if there is only one electrode, the work will only get rusty on the side of the cathode, and the other side will be in the shadow. That's ok, but you'll have to rotate the work to achieve an even coating of rust. It's for this reason that complex shapes are a little problematic. Remember to keep the cathode and anode separated by a few inches. You don't want them to touch, or you'll create a short. That's bad. Remember how we were going to wait to mix in the baking soda? First get everything set up with tap water. Without hooking up your power supply, test it with a voltmeter. With my arc welder, I read about 72 volts. Now hook up the power supply to the electrolysis set up. Check the voltage again. If your water is pretty clean, you'll read about the same voltage. That's bad. Keep the meter hooked up. Now slowly dump in the baking soda (or whatever else you choose to use). Watch the voltage go down, down, down. With my electrolyte mixed up, I read about 20-30 volts. That means I'm dropping (using up) about 40-50 volts. That's good. The more voltage drop, the more work you're doing. If you don't have a meter or don't want to waste your time, don't bother with this. I just like to hook up meters and test things, and thought you might, too. |
|||||||||||||||||||||||||||||||||||||||||||||||||||||||||||||||||||||||||||||||||||||||
 |
|||||||||||||||||||||||||||||||||||||||||||||||||||||||||||||||||||||||||||||||||||||||
 |
|||||||||||||||||||||||||||||||||||||||||||||||||||||||||||||||||||||||||||||||||||||||
Here's a little safety tip. Look at the picture. See how there is space in the bucket above the electrolyte? Remember this. Also remember the warning booklets that come with battery chargers? There's a good reason for the warning. When you run current through water like we're doing, the electricity rips apart the water molecules into their component parts: oxygen and hydrogen. The bubbles you see coming off the electrolyte are oxygen and hydrogen. Remember the Hindenburg? All was hunky-dory until a spark was created. Whether it's lightning or disconnecting the lead from the arc welder, the "POW!" is very impressive. Just remember that you're dealing with an explosive mixture. |
|||||||||||||||||||||||||||||||||||||||||||||||||||||||||||||||||||||||||||||||||||||||
 |
|||||||||||||||||||||||||||||||||||||||||||||||||||||||||||||||||||||||||||||||||||||||
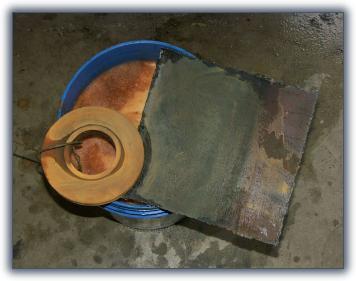
This is the result of about half an hour in the bucket using the arc welder as the power supply. The battery charger would give just as good results, but it would take a little longer. The coating of rust is fairly even. If you want the coating to be more even, rotate it more often. If you want a finer grain on the rust, use a lower voltage (battery charger), and periodically rub the loose rust off of the work. |
|||||||||||||||||||||||||||||||||||||||||||||||||||||||||||||||||||||||||||||||||||||||
 |
|||||||||||||||||||||||||||||||||||||||||||||||||||||||||||||||||||||||||||||||||||||||
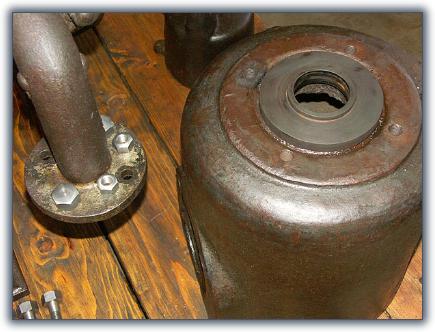
The flange shown here is the final result of my first experiment. It's the same rusty piece that you see pictured above. Treating the rusted finish with boiled linseed oil resulted in a finish that was too red. Next, linseed oil with a dab of stove polish was applied. The result was a little darker color than I was shooting for, but it will be acceptable, especially after a little use. |
|||||||||||||||||||||||||||||||||||||||||||||||||||||||||||||||||||||||||||||||||||||||
 |
|||||||||||||||||||||||||||||||||||||||||||||||||||||||||||||||||||||||||||||||||||||||
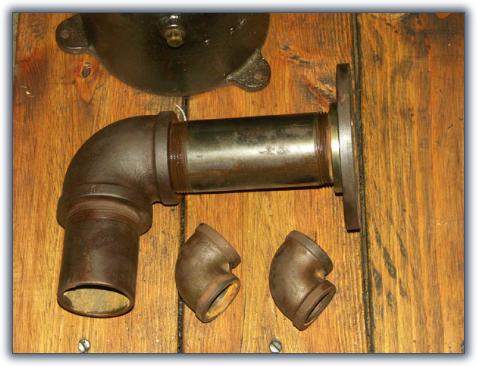
These parts are the second batch. The amount of stove polish and oil was adjusted, and the resulting color is very close to the original. Personally, I like linseed oil as the basis for finishes. Other kinds of pigment can be added to achieve the "tint" that you're looking for. Experiment! If the part doesn't come out exactly like you want, clean it off and stick it back in the bucket. |
|||||||||||||||||||||||||||||||||||||||||||||||||||||||||||||||||||||||||||||||||||||||
|
|
|||||||||||||||||||||||||||||||||||||||||||||||||||||||||||||||||||||||||||||||||||||||